
Saving Artwork for Press
We ask for artwork for print to be supplied to us as Pdf files, at correct page size, with colours set up as required and with all fonts embedded. 3mm bleed is required. The following explains in more detail how to prepare your Pdf file so that problems don’t arise:
COLOUR USE
The RGB (Red, Green, Blue) colour model is used for images in electronic systems, such as TVs and computers, but not for print. Use of RGB should be avoided in print design.
The CMYK (Cyan, Magenta, Yellow, Black) colour model is used for printed material.
Files for print should always be supplied as CMYK unless spot colours are required (a spot colour being a colour not achievable using CMYK). If Spot colours are required they should be set within the artwork with clear Pantone References.
If your artwork is designed in RGB colours, it will be converted to CMYK at the press. (Colours achievable in CMYK are not the same as RGB, therefore the printed article will not necessarily look as you expect).
How to indicate areas for Spot UV & Cutter/fold Guides
To indicate areas of required Spot UV application or specific areas for trimming/folding please use an overprinting Spot Colour on the relevant page(s) of the artwork, clearly named (e.g. SPOT UV).
Black & white in print
As a rule of thumb: black should always be set to overprint and other colours, including white, should be set to knockout. If White
is set to overprint it won’t appear on the plate (white being the absence of colour).
When black overprints an image different shades of black can appear as the image varies in density beneath. This can be a common problem when a picture box runs below a black solid. In a case such as this the black needs to be set to “knockout”.
To achieve a dense black solid you can create a “rich black”in your artwork. 100% black and a small addition of approx 20%
cyan or 20% magenta (or even both for more depth) will achieve this. Black for text use should be 100% black only and not a
mix of colours.
BLEED & TRIM
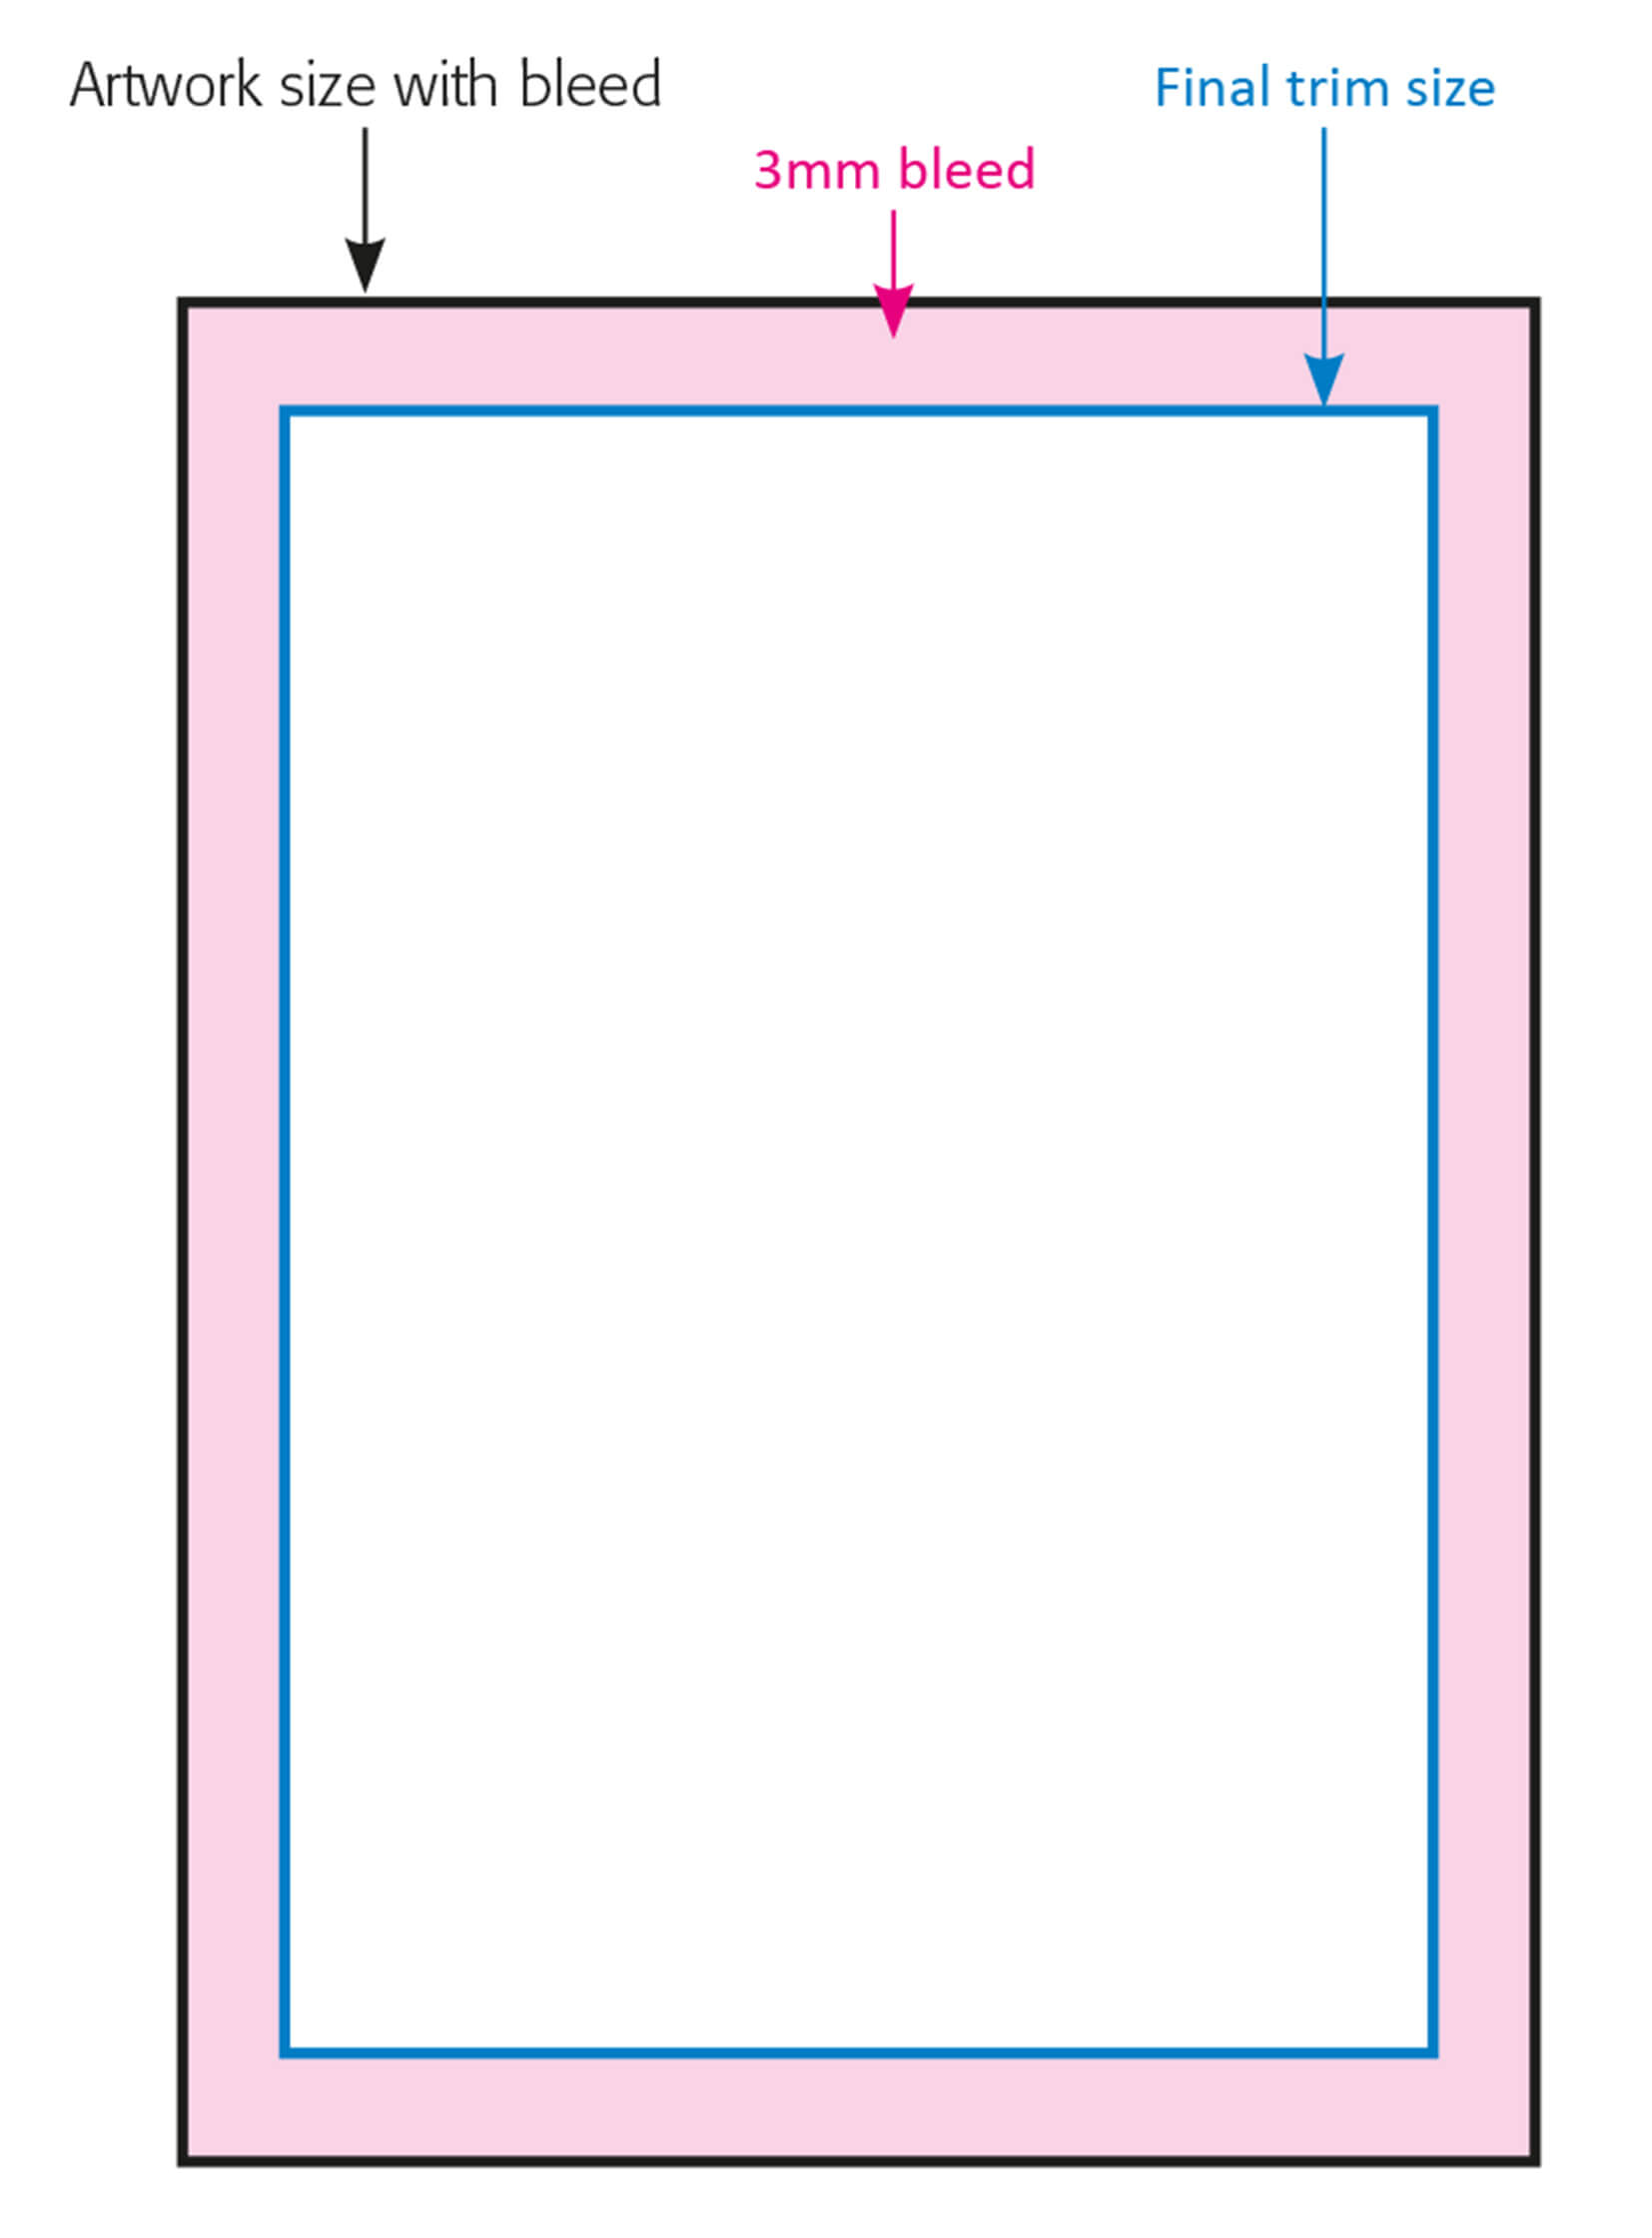
Bleed
The ‘bleed’ is the area which is trimmed off at the press. It gives the printer a small
amount of space to account for minor movements of the paper. The bleed ensures
that no unprinted edges appear in the final trimmed product.
Bleed is necessary as it is extremely difficult to print exactly to the edge of a sheet
of paper or card. To achieve this, a larger area than is needed is printed and then
the paper/card is trimmed down to the required size. Images and other details which are intended to extend to the edge of the page must go beyond the trim line to give
a bleed.
Each page of your artwork should have a minimum of 3mm bleed all around (any background colour/detail which runs up to the edge of the page should extend off
the page by 3mm). Failure to include this runs the risk of trimming issues at press.
Trim
The final size of a printed page after excess edges have been cut off is the trim size. Crop marks indicating where to cut should be printed at the edges of the paper that
are then trimmed after printing.
The document is printed on a larger sheet of paper then cut down to the trim size at
the press.
PDFs
Supply Your artwork as a press-ready PDF
Submitting your file as a press PDF ensures it is in a stable, industry-standard format ideal for use by any printing press.
Supply one PDF with separate pages
Supply your PDF as one file. Each page from your original document should be a separate page within the PDF, in the right order, one after the other. Don’t try to impose your job – this will be done at the press.
Include bleeds
Each page in your PDF should have a minimum of 3mm bleed all around. Failure to include this runs the risk of trimming issues.
Embed fonts
When you create your PDF, make sure that you embed all fonts which have been used. This means that if a font has been used which isn’t installed at the press, it won’t cause problems and will print as intended.
Make sure all images are high resolution
300dpi is suitable for printing. 250dpi is not too bad. Below 200dpi should be avoided as there will be loss of image quality.
Do not force low-resolution images up to a higher resolution within Photoshop, or similar software, as this does not improve the quality of the image.
Use a safe copy area
Don’t allow text or images to be too close to the edge of the page as you run the risk of details being lost during trimming.
The exception is any background images or detail intended to bleed off the edge of the page.
CREATING A PDF
A press PDF should be created from artwork which is complete and approved (ie, no further amendments are required). In the artwork ensure all images are linked and that no fonts are missing.
InDesign
Go to: FILE – ADOBE PDF PRESETS then select the Preset which you want to use. When the EXPORT window pops up select where to place the file and name it.
The resulting PDF should now be ready for press use. (Note that the Pdf Preset will not ‘correct’ issues within the job, such as low-res images, absence of bleed, colour trapping issues etc. These need to be addressed during the setting of artwork).
Quark
Go to: FILE – EXPORT – LAYOUT AS PDF – then name the file.
Select the Preset which you want to use in the Pdf style options.
The resulting PDF should now be ready for press use. (Note that the Pdf Preset will not ‘correct’ issues within the job, such as low-res images, absence of bleed, colour trapping issues etc. These need to be addressed during the setting of artwork).
PDF PROOFS FROM PRESS
PDF press proofs are a convenient and quick way for clients to give final approval to artwork before a press run. However, be aware that they aren’t guaranteed to view on screen in exactly the same way they will output to print. For example, any overprinting elements may not view correctly if you don’t have ‘Overprint Preview’ switched on in your Acrobat settings. If you only have Acrobat Reader (version 7 or later is required) you need Overprint Preview selected: go to EDIT PREFERENCES – PAGE DISPLAY – OVERPRINT PREVIEW.